


Next
필자는 Nextjs를 자주 애용하는데 리액트의 개발 환경을 매우 간단하게 구축할 수 있고 간단한 것에 비해 상당히 합리적인 개발환경을 가지고 있다고 생각하기 때문이다. 또한 SSR까지 손쉽게 가능하니 좋아하지 않을 수가 없다.
그러다 최근에는 정적 페이지도 개발하고 싶어졌는데 방법을 찾아보니 매우 간단하더라.
next build
next export
Next 14에서는 export라는 명령어가 제거되고 next.config.js를 수정해야 한다.
// next.config.js
/** @type {import('next').NextConfig} */
const nextConfig = {
    output: 'export'
}

module.exports = nextConfig
next build
위 명령어를 실행하면 out 디렉터리에 빌드된 페이지가 생성된다.
Command for Deploy
우선은 깃허브 블로그의 방식처럼 메인 브랜치에 코드를 올리면 다른 브랜치에 배포될 파일을 올리고 해당 페이지를 깃허브를 통해 서빙하고자 한다.
touch out/.nojekyll # jekyll 페이지 빌드를 막기 위함
git add out/
git commit -m 'deploy to gh-pages'
git subtree push --prefix out origin gh-pages
우리는 이걸 GitHub Action을 통해서 자동화 할 것이다.
GitHub Action
리포 속 .github/workflows 안에 아래 파일을 생성하면 된다.
name: Deploy

on:
  push:
    branches:
      - main

permissions:
  contents: write

jobs:
  deploy:
    runs-on: ubuntu-latest

    strategy:
      matrix:
        node-version: [20.x]

    steps:
    - uses: actions/checkout@v3

    - name: Use Node.js ${{ matrix.node-version }}
      uses: actions/setup-node@v3
      with:
        node-version: ${{ matrix.node-version }}

    - name: Install
      run: npm ci

    - name: Build
      run: npm run build

    # Next 14에서는 이 액션을 제거합니다.
    - name: Export
      run: npm run export

    - run: touch out/.nojekyll

    - name: Deploy (Client)
      uses: JamesIves/github-pages-deploy-action@v4
      with:
        branch: gh-pages  # 배포될 브랜치
        folder: out
        clean: true
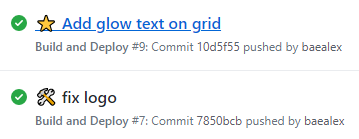
이제 메인에 푸시를 하면 깃허브 액션이 자동으로 빌드를 해주고 위 설정한 브랜치에 결과물이 잘 올라오는 것을 확인할 수 있다.
gh-pages 브랜치를 사용한다면 페이지 설정이 기본으로 적용될 것인데 그 외 브랜치를 사용하고 있다면 별도의 설정을 해줘야 한다.