

일렉트론은 Web Stack을 이용하여 데스크톱 어플리케이션을 개발할 수 있는 도구이다. GitHub에서 Atom을 제작하기 위해서 만들었으며 일렉트론을 사용하여 만들어진 어플리케이션은 Slack, VS Code, Discord가 있다. 기본적으로 크로미움을 내장하고 있는 것으로 보인다.
프레임워크 구성
main.js
- 메인 프로세스
- 데스크톱 앱의 백엔드 역할을 수행
- 앱 자체의 총괄적인 부분(Node.js와 거의 동일)
- 업데이트 제어
- OS GUI API 제어(윈도우, 트레이, 메뉴, 컨텍스트 팝업)
renderer.js
- 렌더러 프로세스
- 데스크톱 앱의 프론트엔드 역할을 수행
- 브라우저 화면, HTML/CSS/JS를 처리
내장기능
Notification
윈도우10의 경우 좌측에 알림 메세지가 출력되는 것을 의미한다. renderer.js에 다음과 같은 내용 추가하면 사용할 수 있다.
let myNotification = new Notification('Title', {
    body: 'Lorem Ipsum Dolor Sit Amet'
})

// 이건 알림을 클릭했을 때 발생하는 이벤트
myNotification.onclick = () => {
    console.info('Notification clicked')
}
Prograss
윈도우의 경우 하단에 아이콘에 프로그램의 진행도를 표시할 수 있다. main.js에서 BrowserWindow가 선언된 부분에 아래와 같이 작성하면 사용할 수 있다.
mainWindow.setProgressBar(0.5)
통신(?) 방법
프론트엔드와 백엔드(?)의 통신(?)은 Main의 ipcMain과 Render의 ipcRenderer를 통해서 진행된다. 기존 튜토리얼에선 별다른 설정없이 Render에서 다음 라이브러리를 호출하는 것 같으나 상위 버전에선 불가능하여 찾아보니 BrowserWindow를 생성할 때 다음과 같은 Preferences를 생성해야 한다.
webPreferences: {
    nodeIntegration: true
}
Main
const { ipcMain } = require('electron')
ipcMain.on('asynchronous-message', (event, arg) => {
  console.log(arg);
  event.sender.send('asynchronous-reply', 'pong')
})
Render
const { ipcRenderer } = require('electron')

ipcRenderer.send('asynchronous-message', 'ping')
ipcRenderer.on('asynchronous-reply', (event, arg) => {
    console.log(arg)
})
위와같이 통신을 진행한다.
Event
커스텀 이벤트를 만들어 보기 위해서 index.html에 다음과 같은 버튼을 추가하고 웹사이트를 만들때 처럼 직접 onclick을 넣었더니 오류가 발생했다.
<button onclick="btnClick()">click here</button>
무조건 다음과 같이 해야하나 보다.
<button id="mainButton">click here</button>
var mainButton = document.getElementById('mainButton');
mainButton.addEventListener('click', function() {
    alert('btn click!')
});
Electron에 React 얹기
우선 Example 코드를 받아보자. 이 프로젝트에선 yarn을 사용하고 있는데 npm을 사용할 수 있겠지만 그냥 다운받았다.
- https://yarnpkg.com/lang/en/
git clone https://github.com/kitze/react-electron-example
cd react-electron-example
yarn
yarn start
위 명령어를 콘솔에 입력하면 다음과 같은 창을 만날 수 있다!
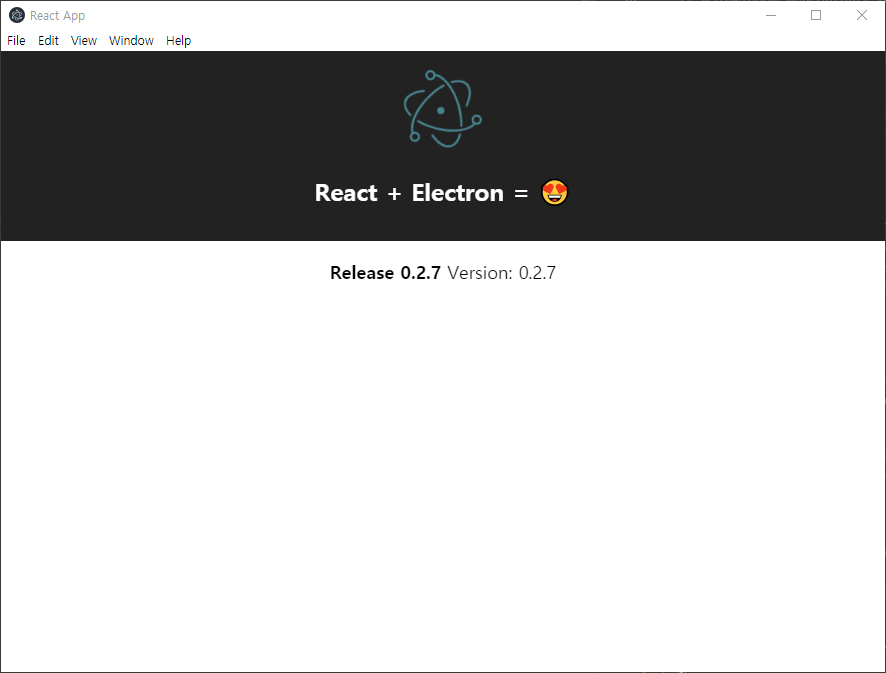
어떤 원리로 돌아가는가 보았더니
mainWindow.loadURL(
    isDev
        ? "http://localhost:3000"
        : `file://${path.join(__dirname, "../build/index.html")}`
);
개발중에는 React와 마찬가지로 3000번 포트에 올려서 Electron도 그 화면을 보여주고 빌드시에는 React를 빌드하고 빌드된 화면으로 실행하는 듯
다시 통신 방법
리액트에선 어떻게 Electron과 통신할까?
Main
const { ipcRenderer } = window.require("electron");

class App extends Component {
    ...
    btnClick = () => {
        ipcRenderer.send('button-click');
    }
    render() {
        ...
        return (
            <button onClick={this.btnClick}></button>
        )
        ...
    }
}
Electron에서는 아까와 똑같이 이벤트를 처리해주면 된다!
Render
const { ipcRenderer } = window.require("electron");

class App extends Component {
    componentDidMount = () => {
        ipcRenderer.send('call-init');

        ipcRenderer.on('data-init', (event, arg) => {
            this.setState({
                information: arg,
            });
            this.id = arg.length;
        });
    }
}
componentDidMount에 이벤트를 작성했더니 정상적으로 동작했다.
ipcMain.on('data-save', (event, arg) => {
  fs.writeFile('save.data', JSON.stringify(arg), 'utf8', function(error) {
    console.log('error');
  });
})

ipcMain.on('call-init', (event, arg) => {
  fs.readFile('save.data', function(error, data) {
    event.sender.send('data-init', JSON.parse(data));
  })
})
컴포넌트를 초기화 한 경우 call-init 이벤트를 실행하여 값을 초기화해주고 data-save 이벤트가 발생하면 현재의 상태를 파일로 저장하는 코드이다.
상태 관리하기
이 부분은 필자가 React를 복습하기 위해 작성하는 부분이다.
데이터 추가하기
class App extends Component {
    id = 2
    state = {
        information: [
            {
                id: 0,
                name: '배진오',
                phone: '010-0000-0000'
            },
            {
                id: 1,
                name: '홍길동',
                phone: '010-0000-0000'
            },
        ]
    }
    handleCreate = (data) => {
        const { information } = this.state;
        this.setState({
            information: information.concat({
                id: this.id++,
                ...data,
            })
        })
        //console.log(data)
    }
    render() {
        const { information } = this.state;
        return (
            <div>
                <PhoneForm
                    onCreate={this.handleCreate}
                />
                {JSON.stringify(information)}
            </div>
        )
    }
}
값 교환하기
class App extends Component {
    handleCreate = (data) => {
        console.log(data)
    }
    render() {
        return (
            <div>
                <PhoneForm
                    onCreate={this.handleCreate}
                />
            </div>
        )
    }
}
위처럼 메서드 하나를 하위 컴포넌트의 props로 넘겨주고 하위 컴포넌트에서 해당 함수로 다음과 같이 값을 전달하면 된다.
class PhoneForm extends Component {
    state = {
        name: '',
        phone: '',
    }
    handleChange = (e) => {
        this.setState({
            [e.target.name]: e.target.value
        });
    }
    handleSubmit = (e) => {
        e.preventDefault();
        this.props.onCreate(this.state);
        this.setState({
            name: '',
            phone: '',
        })
    }
    render() {
        return (
            <form onSubmit={this.handleSubmit}>
                <input
                    placeholder="이름"
                    value={this.state.name}
                    onChange={this.handleChange}
                    name="name"
                />
                <input
                    placeholder="전화번호"
                    value={this.state.phone}
                    onChange={this.handleChange}
                    name="phone"
                />
                {/*<div>{this.state.name} {this.state.phone}</div>*/}
                <button type="submit">등록</button>
            </form>
        )
    }
}
컴포넌트가 깊어지면 깊어질수록 점차 작업이 귀찮아진다. Redux와 같은 패키지를 활용하면 이를 좀 더 수월하게 처리할 수 있다.
쉘 사용하기
Electron에는 shell이라는 라이브러리가 있다. 이 shell을 이용해 OS에 설정된 브라우저로 특정 주소를 띄우거나 파일 탐색기로 특정 위치에서 실행할 수 있다.
사용 방법
// MAIN 에서 호출시
const { shell } = require('electron')
// Renderer 에서 호출시
// const { shell } = require('electron').remote

//폴더 이름
const FOLDER_PATH = 'temp'

shell.openExternal(FOLDER_PATH)
위와 같이 사용하면 현재 프로젝트 폴더의 하위 temp 폴더 위치에서 파일 탐색기를 실행한다. 아래의 코드는 절대 경로를 직접 지정해 주는 코드이다. 실행 결과는 동일하다.
const path = require('path')

// MAIN 에서 호출시
const { shell } = require('electron')
// Renderer 에서 호출시
// const { shell } = require('electron').remote

const FOLDER_PATH = 'temp'

shell.openExternal(path.join(__dirname, FOLDER_PATH))
네이티브 모듈 사용하기
일렉트론에선 분명히 노드 모듈을 사용할 수 있다고 명시되어 있었는데 막상 패키지를 설치하여 실행해보니 아래와 같은 에러가 발생했다.
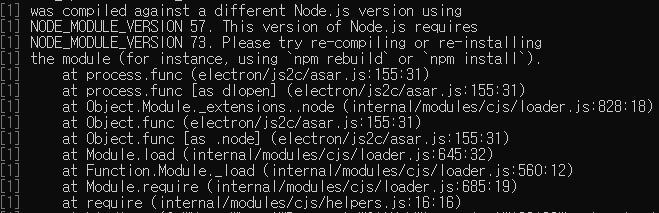
문서를 살펴보니 재빌드가 필요하다고 한다.
- https://www.electronjs.org/docs/tutorial/using-native-node-modules
필자는 가장 간단한 방법으로 보여지는 '모듈을 설치하고 Electron용으로 다시 빌드하기'를 선택하였다. 윈도우와 맥에서 각각의 선행 작업이 필요하다.
Windows
- Visual Studio 설치
- Python 설치
위 작업을 마무리하고 아래 명령어를 입력하여 모듈 재빌드를 실시할 수 있다.
- Git Bash를 사용하고 있는 경우
./node_modules/.bin/electron-rebuild
- CMD를 사용하고 있는 경우
.\node_modules\.bin\electron-rebuild.cmd
Mac OS
- Xcode >= 9.0.0
- TLS 1.2을 지원하는 Python 2.7
위 작업을 마무리하고 아래 명령어를 입력하여 모듈 재빌드를 실시할 수 있다.
./node_modules/.bin/electron-rebuild
GYP?
이건 그냥 여담으로 작성하는 부분인데 Python이 왜 필요한지 의문이었다. gyp라고 불리는 이 라이브러리가 파이썬에 의존적인 듯 보인다. gyp는 미리 빌드된 바이너리와 함께 네이티브 Node 모듈을 배치하는 방법을 제공하며 수 많은 유명한 모듈들이 이를 사용하고 있다.
빌드 및 배포하기
필자가 사용하는 Electron React Example 리포에선 이미 빌드 명령어가 만들어져 있는 상태라 npm run build 명령어를 치면 dist에 빌드된 파일이 생성된다. 설치 파일까지 알아서 생성된다(이건 일렉트론에서 기본적으로 해주는 듯) x64 기반으로 빌드가 진행되는데 차후에 아키텍처 별로 빌드가 필요한 상황이 온다면 더욱 상세하게 내용을 알아보고 여기에 추가하도록 할 예정이다.
우선 기본 빌드 명령어는 다음과 같이 구성되어있다.
react-scripts build && electron-builder
아이콘 변경하기
아이콘 설정시 기존 자료들이 하라는대로 시도했지만 원활히 동작하지 않았다. 우선 여기서 사용중인 Electron + React 리포의 구조를 살펴보면 public에 electron의 코드가 포함되어 있다는 것을 감안했어야 하는데 그렇지 않아서 겪은 문제다.
- [D] public
  - [D] assets
    - [F] main.js
    - [F] favicon.png
    - [D] icons
      - [D] win
        - [F] icon.ico
      - [D] mac
        - [F] icon.icns
일단 앱 내에서 상단바나 상태바에 아이콘을 변경하는 건 PNG 파일로 가능하다. Main에서 윈도우를 생성할 때 아이콘의 경로를 알려주면 된다. Main의 경로를 바탕으로 말이다. 그런데 말입니다.
mainWindow = new BrowserWindow({
  resizable: false,
  width: 760,
  height: 600,
  webPreferences: {
    nodeIntegration: true
  },
  icon: __dirname + '/favicon.png'
});
앱 실행이나 설치 아이콘의 변경이 필요하다면 이 PNG 파일을 윈도우라면 ico 파일로 맥이라면 icns 파일로 변환이 필요하다. 그리고 package.json에서 build 옵션을 설정해주면 된다.
"build": {
  "win": {
    "icon": "./public/assets/icons/win/icon.ico"
  },
  "mac": {
    "icon": "./public/assets/icons/mac/icon.icns"
  }
},